The correct ergonomic keyboard position puts the letter keys at elbow height, about 5 cm (2 inches) from the desk edge, with elbows open 90 to 110 degrees and wrists straight rather than resting on the desk. Keep the rear feet folded, or use a slight negative tilt if that lets the hands stay in line with the forearms. That answer costs nothing and takes about ninety seconds, which stung a little once I worked out I had spent years blaming the keyboard itself for the ache that showed up in my forearms every afternoon.
This is a setup guide, not medical advice. It leans on occupational-ergonomics sources rather than my hunches: the Canadian Centre for Occupational Health and Safety, Cornell University’s ergonomics program, and OSHA. If your hands already hurt, see a professional. If they just feel tired and stiff by mid-afternoon, the ergonomic keyboard position below is where I would start, because it is free and it clears up the most common causes first.
Last updated: August 29, 2026.
| Check | Correct posture | Incorrect posture |
|---|---|---|
| Keyboard height | Keys level with the elbows | Shoulders lifted to reach the keys |
| Elbows | Close to the body, 90 to 110 degrees | Reaching forward or flared outward |
| Wrists | Straight and floating while typing | Bent upward or pressed into the desk |
| Keyboard angle | Flat or slightly sloped away | Rear feet lifting the back edge |
| Mouse | Beside the letter keys at the same height | Far enough away to pull the shoulder forward |
Table of Contents
- The Fix Is Placement, Not a New Keyboard
- Get Your Wrists Straight, and Off the Desk
- Set the Height From Your Elbows
- Skip the Flip-Out Feet
- Center It, and Bring the Mouse Close
- Wrist Rests: When They Help and When They Hurt
- Frequently Asked Questions
- The Short Version
The Fix Is Placement, Not a New Keyboard
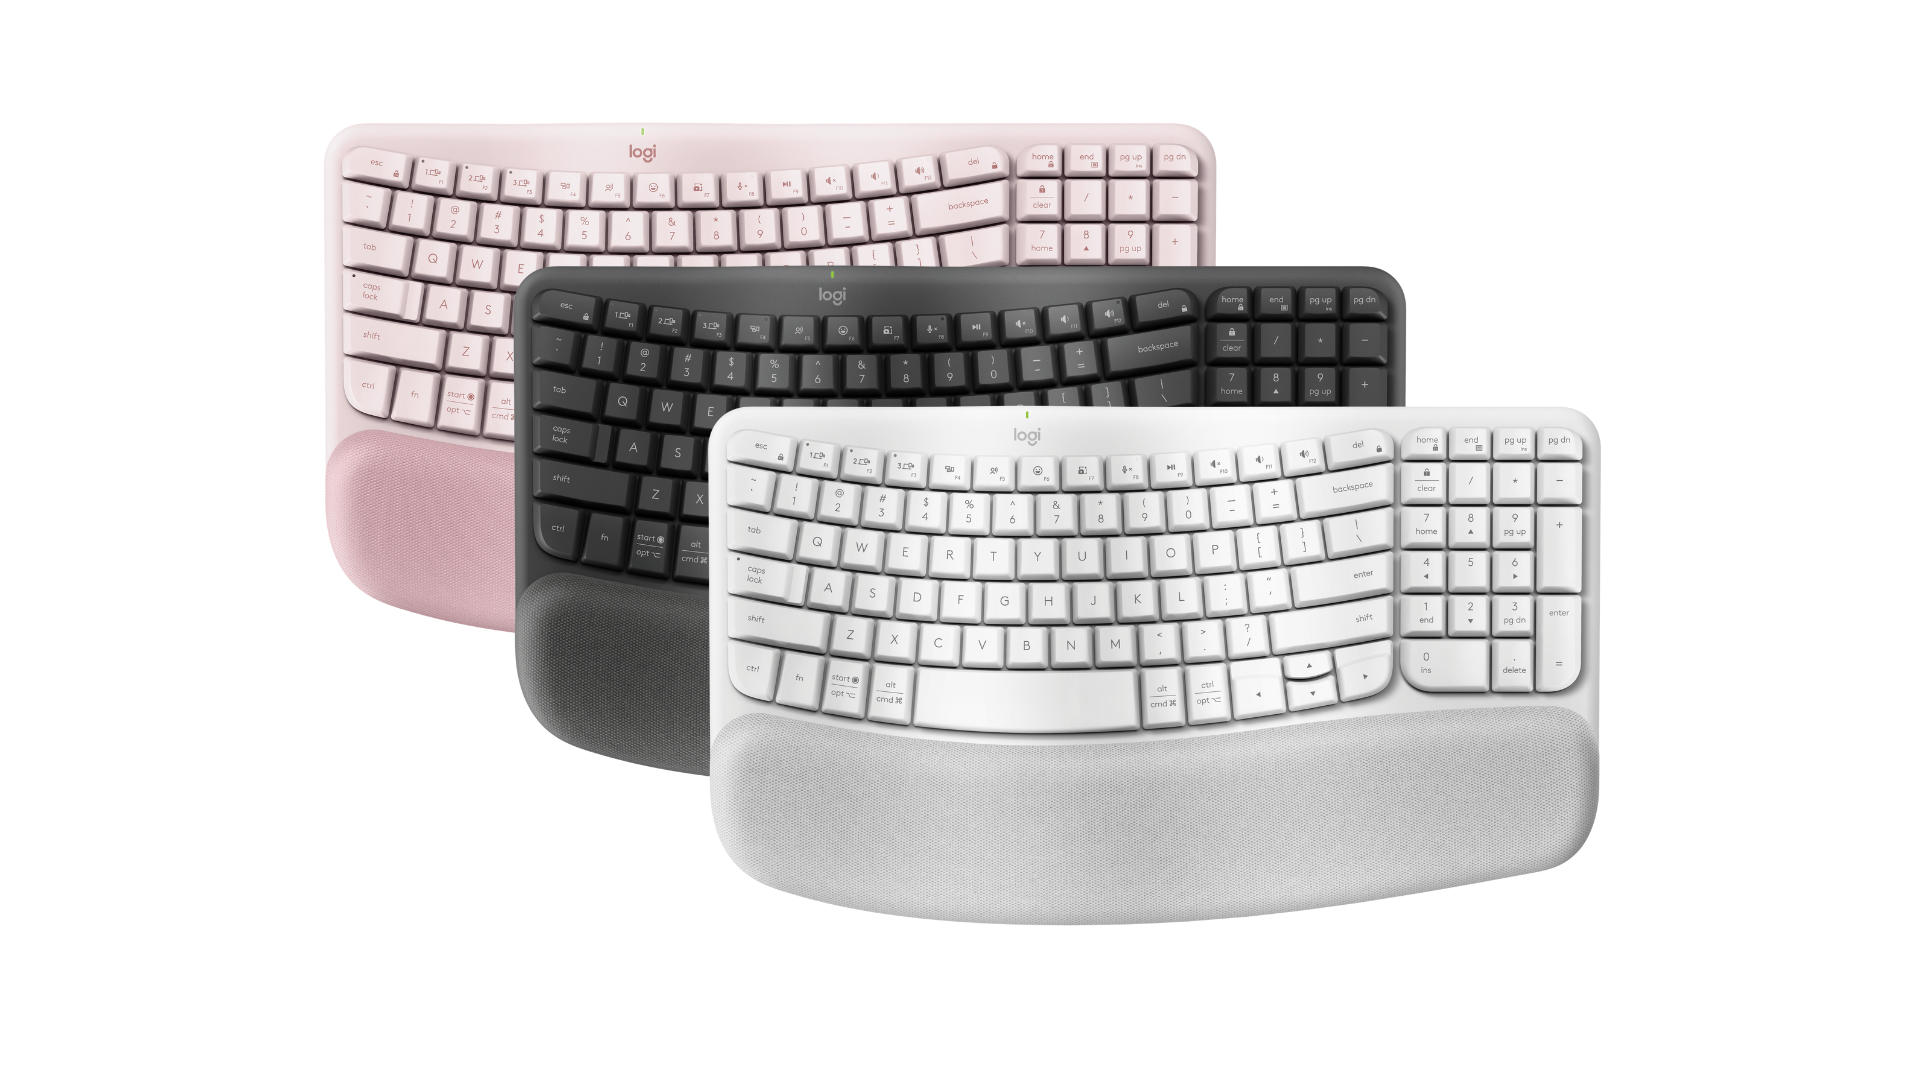
Search “sore wrists from typing” and the results push hardware at you within two clicks. Ergonomic keyboards are real and some are genuinely good. A curved or split layout reduces how far your wrists twist sideways, which ergonomists call ulnar deviation, and a few of them, like Logitech’s Wave Keys, build a soft palm rest into the case. But a split keyboard shoved too far forward, tilted up on its back feet, with your wrists mashed into the desk edge, recreates every problem it was sold to solve.
So before you spend anything, get the ergonomic keyboard position right on the board you already own. The rules below are the same whether your keyboard is flat, split, or shaped like a boomerang. If you fix placement and your hands still complain, then go shopping, and you will actually be able to tell whether the new board helped, because you changed one thing at a time.
Get Your Wrists Straight, and Off the Desk
The single most important part of any ergonomic keyboard position is a neutral wrist. CCOHS defines that plainly: the wrist is aligned straight with the forearm and is not bent or extended in any direction. Cornell says the same in its own words, telling you to keep your wrists as flat as possible and not bent left or right. If you can draw a straight line from your knuckles back through your forearm, you are there.
Here is the part people get wrong. Your wrists should not rest on the desk while you type. CCOHS warns that leaning them on the desk surface puts pressure on the carpal tunnel area and can contribute to contact stress injuries. The idea is that your hands float and move to reach the keys, with the whole forearm gliding, rather than anchoring your wrists in one spot and stretching your fingers. It feels lazy at first. It also stops the pins-and-needles feeling, so I got over it.
Set the Height From Your Elbows
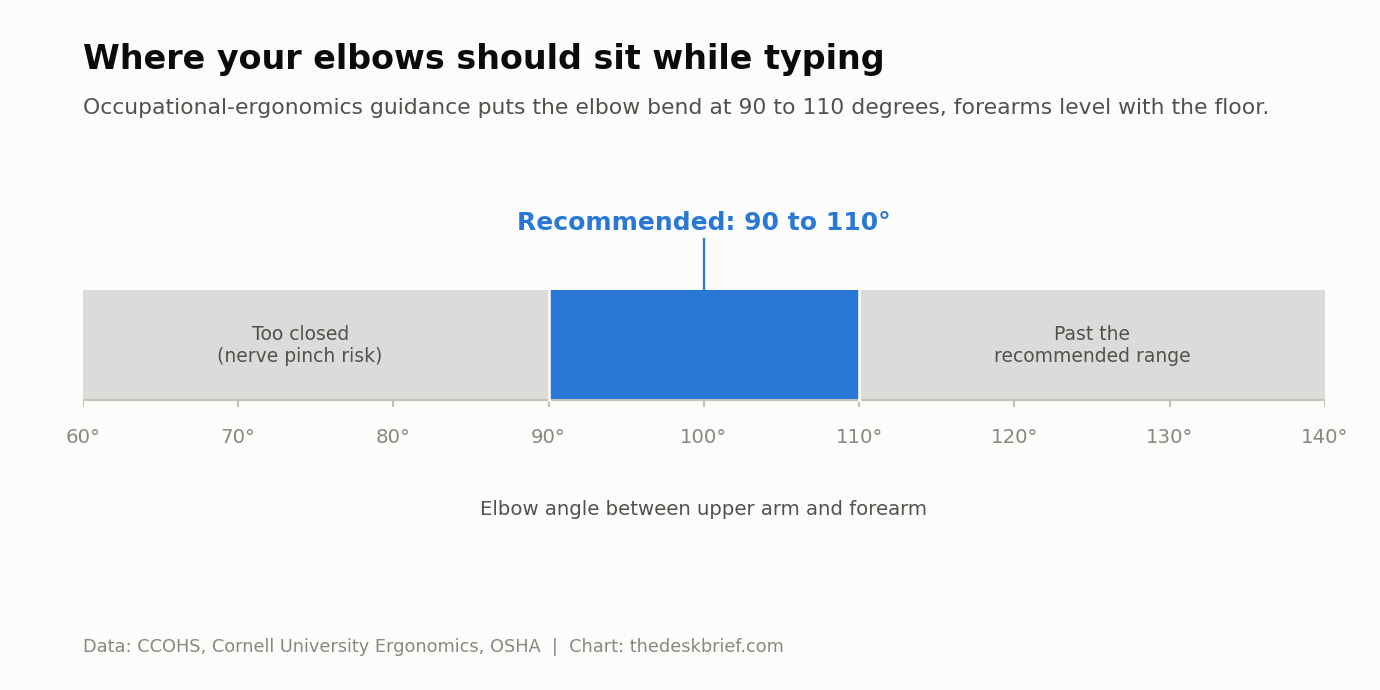
Your ergonomic keyboard position starts at the elbow, not the desk. Sit back in the chair with your shoulders relaxed and let your upper arms hang. CCOHS puts the target elbow angle between 90 and 110 degrees, with the forearms roughly level with the floor. Cornell adds a reason to respect the lower end: keep the elbow angle at or greater than 90 degrees to avoid pinching the nerve that runs through the elbow.
Once your arms are in that window, the keyboard belongs wherever your hands land, which is usually a bit lower than a standard desk. OSHA describes it as elbows about the same height as the keyboard, forearms approximately parallel with the floor. If your desk is too tall to allow that, you drop the chair and add a footrest, or you fit a keyboard tray under the desk. Raising the keyboard to meet a high desk is the move that quietly wrecks everything downstream.
Skip the Flip-Out Feet
Nearly every keyboard has two little legs that flip out under the back edge, and nearly everyone pops them open on instinct. They tilt the back of the board up and away, which forces your wrists to bend upward to reach the keys. That upward bend is exactly the extended posture the neutral-wrist rule is trying to prevent, so leave the feet folded flat.
If anything, tilt the board the other way. Cornell recommends a negative tilt, meaning the keyboard slopes gently down and away from you, which keeps the wrists flatter when your hands come in from slightly above. You do not need a special tray to test the idea. Sit tall, hold your hands over the keys the way you actually type, and notice which slope lets your wrists stay straight. That angle is the one your ergonomic keyboard position wants.
Center It, and Bring the Mouse Close
Center the keyboard on you, but center it on the letters, not the whole slab. On a full-size board the number pad pushes the alphabet keys to the left, so if you line up the middle of the entire keyboard with your nose, your right hand drifts out to the mouse and your left shoulder rolls forward. Line up the B key, roughly the center of the letter block, with your body instead. If you rarely touch the number pad, a tenkeyless board makes this effortless and pulls the mouse closer too.
Leave a small gap in front. CCOHS suggests keeping the keyboard close to the front of the desk but not right at the edge, about 5 cm or 2 inches back, so your forearms have somewhere to travel. Put the mouse at the same height, right beside the keyboard, so you are not reaching up or out for it. CCOHS sums up the whole arrangement as shoulders relaxed and elbows close to the body, which is a decent gut check for the entire ergonomic keyboard position once you think you are done.
Wrist Rests: When They Help and When They Hurt
A wrist rest is not a place to park your wrists, which is an awkward thing to learn from the name. CCOHS is direct about it: your hands should move freely and stay elevated above the rest while you type, and leaning your wrists on it for long periods can load the carpal tunnel and cause the very problems you bought it to fix. The rest is for the pauses between typing, not the typing itself.
If you do use one, CCOHS lays out what a good one looks like. It should contact the heel or palm of your hand, never the wrist itself. It should be relatively soft and rounded, at least 3.8 cm or 1.5 inches deep, and match the width, height, and slope of the front edge of your keyboard. The honest catch is that a properly set desk, chair, and keyboard height can remove the need for one entirely. I keep a soft one around for breaks and ignore it while my fingers are moving.
None of this replaces the rest of the desk. A keyboard set perfectly still sits under a monitor that might be too low and a chair that might be too high, so it is worth checking your correct desk height and monitor height in the same sitting. If you want the whole picture, our ergonomic desk setup checklist walks through the lot in order, and a decent laptop stand is what frees you to put a separate keyboard where your elbows actually want it.
Frequently Asked Questions
What is the correct ergonomic keyboard position?
Elbows open to between 90 and 110 degrees with forearms level with the floor, the keyboard at roughly elbow height, wrists straight and floating rather than resting on the desk, and the letter keys centered on your body. That is the whole ergonomic keyboard position, and none of it requires buying anything.
Should my keyboard be flat or tilted up?
Flat beats tilted up. The flip-out feet raise the back edge and bend your wrists upward, away from neutral. Cornell recommends the opposite, a slight negative tilt sloping down and away from you, so keep the feet folded and tilt the board away rather than toward you if you can.
Do I need a split or ergonomic keyboard?
Not to start. A split or curved board can reduce sideways wrist twisting, but only if you place it well, and a well-placed flat keyboard solves most complaints for free. Fix the position first. If your hands still bother you after a couple of weeks, then a split board is a reasonable next step.
Where should my wrists be while typing?
Straight and lifted. Keep the wrist aligned with the forearm, not bent up, down, or to either side, and do not rest it on the desk or a wrist rest while your fingers are moving. CCOHS ties resting the wrists on a hard edge to pressure on the carpal tunnel, so let your hands float and move to the keys.
How high should a keyboard be from the floor?
There is no universal floor measurement. Sit with the feet supported and shoulders relaxed, then set the keys at about elbow height so the forearms stay roughly level and the elbows remain between 90 and 110 degrees. OSHA and Cornell both define keyboard height from the user’s elbows, not from the floor. If a fixed desk is too high, raise the chair and add a footrest or use a keyboard tray.
The Short Version
Nearly everything that matters here is free, which is the good news and the mildly irritating news. Set the board from your body, not your desk, and check it against these numbers from CCOHS, Cornell, and OSHA:
- Elbows at 90 to 110 degrees, forearms level with the floor.
- Wrists straight and floating, never resting on the desk while typing.
- Keyboard at elbow height, roughly 5 cm or 2 inches back from the edge.
- Feet folded flat, or a slight negative tilt away from you.
- Letter keys centered on your body, mouse right beside them.
Spend the ninety seconds before you spend anything else. Get the ergonomic keyboard position right, give it two weeks, and only then decide whether the fancy board is worth it.